


- Joined
- Jul 24, 2023
- Messages
- 8
- Points
- 44
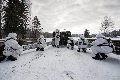
This is my D7 tractor with winch, it is the Mini Art kit,
I have built it as per the instructions but I have to replace the control handles on iy as they are so brittle they are impossible to work with, this is a great pity as the kit is really well done even to the point of being over detailed.
The vehicle was undercoated with grey car primer and then painted in Humbrol 154 yellow that looked a little thin. so I got a tin of Tamiya spray TS-16 and gave it a complete coat of yellow, this was let dry for 12 hours before I gave it a wash of Humbrol 154 yellow again to matt the high gloss effect of the Tamiya paint. this was let dry for another 24 hours as I built the chassis minus the tracks. when hardened I did a light wash of black Revell 8, I let this dry for another 12 hours and then washed the whole vehicle in burnt Umber from Winsor and Newton. this was previously put on a piece of typing paper to pull all the oil out if it, this wash warms up the yellow into a nice hue to make it look more like old Catapiller yellow that is dirty weathered by rust.
The rust marks were started on the running boards and worked towards the chequer plating in the drivers station, this is done with more raw umber, I use a small paint brush 0 x 10, a wooden tooth pick and a needle both on a handle to apply the paint onto a wet (with white spirits) surface doing one panel at a time...this was let dry for a couple of days and then I add another layer of oil paint, this time Burnt Sienna to each and every spot giving a two tone mark to the paint dark centre and soft rusty stain blossom.
The seat was covered with copper tape that can be ripped and torn like real PVC this was then painted black on the outside and light grey on the inside (this will be toned down later) then foam was painted orange colour.
The Hyster winch was painted much the same as the tractor but the cable drum was washed with Humbrol 29 to give it a different rust colour to the rest of the vehicle.
The Engine block was washed down with a very thin wash of black oil paint to show grime, then I weathered it the same way as the rest of the body but a little more intensely to show wear and tear on the block and the donkey engine.
the chassis was built as per the instructions except the covers for the sprocket and idler were left off so I could show off the lovely detail of them. I painted them yellow the same way as the body but I used more paint when weathering them as they would be under more stress and strain from the driving conditions of the environment. the engine cover, side walls and front grill were painted yellow the same way as the body nut being sheet metal they have got more wear and tear then the heavy metal of the vehicle. The bonnet (or hood to our colonial friends) was heavily dry brushed over a few says with oil paint using a very soft brush, the scratches and marks on it were done with a needle dipped in oil paint one scratch at a time and then left to dry for a day.....
Last edited by a moderator:


