Photos SAS Land Rover Series IIA "Pink Panther" photo

The main body of the radio was made today. The native part, which is given in a plastic kit, as well as in a photo-etched kit, is simplified compared to a real radio. Using photo-etching, I tried to make it as close as possible to the original.

lr16.jpg
lr18.jpg
lr23.jpg
lr24.jpg
lr25.jpg
lr26.jpg
lr27.jpg
 
Last edited by a moderator:
Does anyone know what this radio is?
Looks very similar to US RT-175/PRC-9, but with minor differences.
Had the British used RT-175/PRC-9 or is it some other modification of the US/British radio?

Late to the party here - its an A41 which is indeed similar to the PRC8/9/10 series.

Before my time, but there would undoubtedly also have been an HF set carried - in later years a PRC319 but bck then I think it might have been an A13 or C13.
 
Late to the party here - its an A41 which is indeed similar to the PRC8/9/10 series.

Before my time, but there would undoubtedly also have been an HF set carried - in later years a PRC319 but bck then I think it might have been an A13 or C13.
Thank you for information!
 
Thanks to Royal, the creation of the A41 radio was started. At the moment it is at the procurement stage.
A grill was made on the floor in the back, though not as perfect as I would like.
The box for the A43R radio, which is located between the front seats, is supplemented with mountings. The part of the radio under it is modified too.
Also, after studying the photo, I noticed that the native crossbeam on the frame was not thick enough and simplified, as a result it had to be redone.

lr30.jpg
lr28.jpg
lr34.jpg
lr33.jpg
lr32.jpg
lr31.jpg
lr36.jpg
lr35.jpg
 
Last edited by a moderator:
Hello all!
Of course, in view of the events of this day, there are a lot jf more relevant and interesting topics have appeared for discussion. But in any case, maybe someone will look into this thread.

Work on LR has now slowed down again, however, while there is free time, I decided to clarify some more information

All sources write about the fact that in addition to the MG there was also an anti-tank weapon, namely the Karl Gustaf m/48 grenade launcher. This is confirmed by photos of reenactors' machines. However, can they be completely trusted?
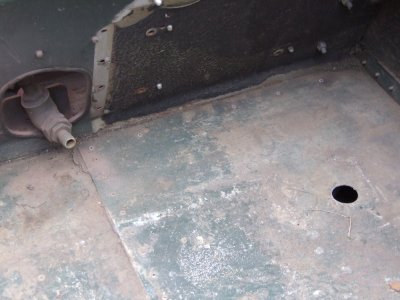
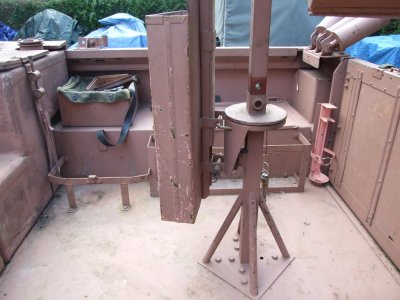
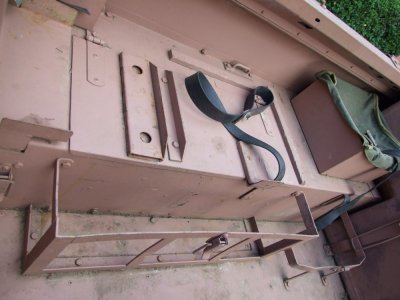
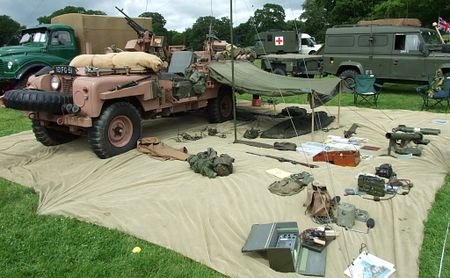
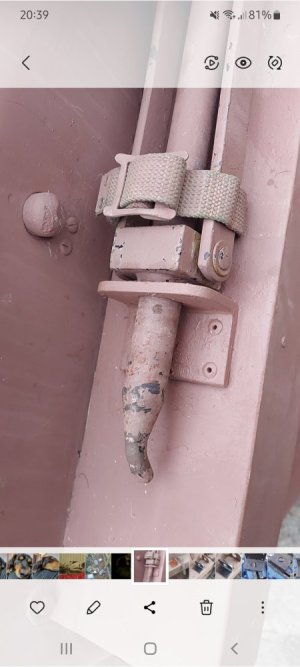
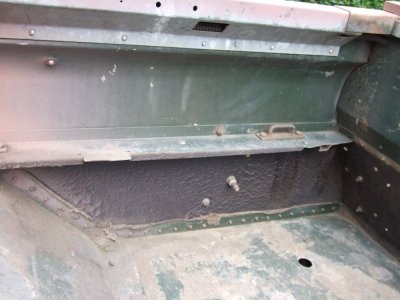
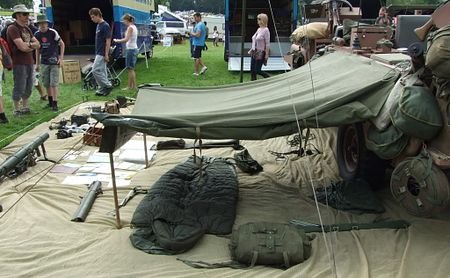
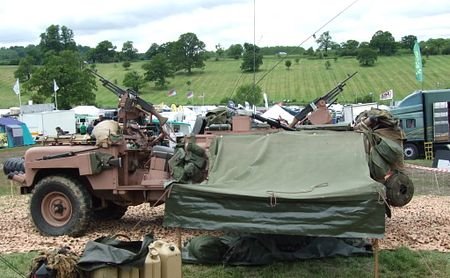
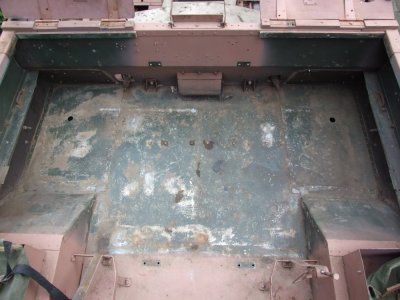
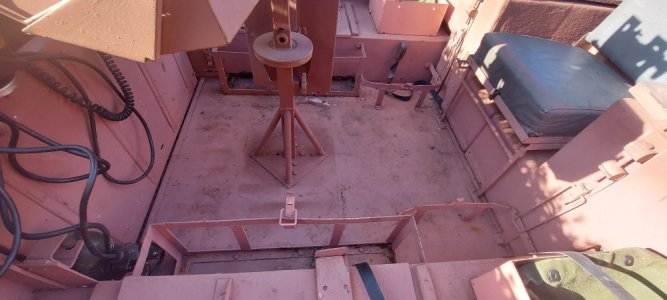
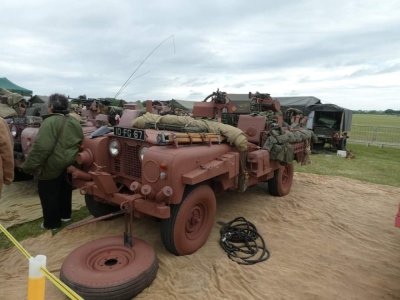
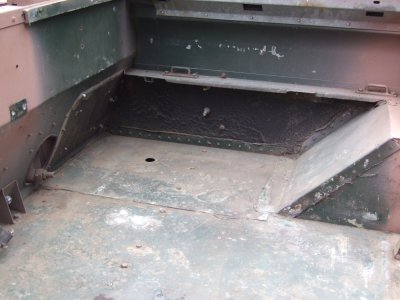
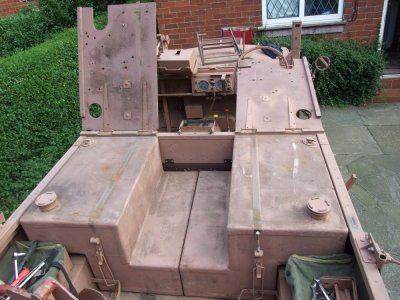
In these cars, there are tubes for some kind of charges in the trunk of LR. In photo 1 there are tubes that I have not identified. In photo 2, there are generally tubes for charges of an 81-mm mortar. In addition, in the archival video (photo 3), there are bagshung in front, sometimes very reminiscent of bags for a 60 mm mortar (photo 4), but on other frames you can see that they are different and look like hydrators...
At the same time, charges for the rocket m/48 were carried in tubes of a different design: they were paired and had noticeable external differences on the lid (photo 5).

I would be grateful if someone could answer the following questions:
1. Did the Pink Panthers really carry anti-tank rocket launcher or could they use mortars?
2. What are the tubes in photo 1? Could these be British (or someone else's) tubes for m/48?
3. What could be transported in bags for a 60 mm mortar, if that really were them? Or were they used for their intended purpose, because the Panthers were armed with various types of mortars?

1.jpg
2.jpg
3.jpg
4.jpg
5.jpg
 
Last edited by a moderator:
They COULD (not DID) carry either the 2" (61mm) mortar or the 81mm mortar or the Charlie G, or a combination of the three. Mortar rounds would likley have been a combination of smoke, HE and Illum. As to the bags, whatever the crew wanted to put in them. The classic example in UKSF was the bag for the M18 Claymore that was carried by many to hold grenades, spare ammo and all sorts of other things. I still use one to hold a selection of Ordnance Survey maps - which fit perfectly. Similarly the tins for the L2A2 grenade (the US M26) were widely used as cooking pots rather than for holding grenades...
 
Hi all!
There hasn't been an update in the thread for a long time, so I'm back with new results.
I decided to work on the engine anyway. To do this, I cut out a large area of plastic, leaving only the desired part of the engine (pink). All other details had to be done by myself.
The engine is greatly simplified, especially in the upper part - the hood will not open, so I work only on what can be seen when viewed from below.

View of the engine itself and the engine compartment. Work in progress, there will be more details, at the moment the main blanks have been made.

lr 1.jpg
lr 2.jpg
lr 3.jpg
lr 4.jpg
lr 5.jpg
lr 6.jpg
lr 7.jpg
 
Last edited by a moderator:
I also made new wardrobe trunks for the FN FAL due to the fact that the relatives from the set were too small and simplified. In addition, I added small details to the wall behind the seats.

lr 10.jpg
lr 11.jpg
lr 12.jpg
lr 13.jpg
 
Last edited by a moderator:
I think I can`t agree with you. Based on the photos I found, the rear bumper on the military version of the car looks like replaced by reinforced one. In addition, the towbar is also different from civilian versions. I brightened the photo and found out that the towbar has a rather complex and massive attachment not only to the bumper, but also to the transverse beam of the supporting frame. If you look at the photos of civilian cars, you can see a gas tank in that place, which is absent on the Pink Panther.

In any case, thanks for the advice, I will study videos about civilian vehicles on Youtube. All that I could find about the Pink Panther have long been saved as screenshots.
We have 2 Pinkies here in Yorkshire, it would be no problem to take specific detail photos you require.
As mentioned elsewhere, the chassis is basically the same as a Military Series vehicle, it differs from civilian Land Rovers by having a heavy duty rear crossmember, NATO hitch, and extended shackles for the springs.
The Pinkies also differ at the front bumper, the JATE style rings are slightly different and the bumper clamps that secure it to the chassis are slightly longer. It's likely that you would only notice the bumper difference when comparing them side to side but it's still a detail nonetheless.
Feel free to ask for more, I think I could probably add extra details yet to be discovered :)
Great build btw. Cheers
 
Man, you are a master. Iam too lazy too put all the fiddely bits on this thing. Have the Tamiya modell, but build straight out of the box :-(

Did they Realy paint the "pink" over the tyres? Thats some kind of weird...
Tyres and canvas would have been painted pink it it was felt necessary, absolute colour camouflage was the preference. In due course, tyres would be replaced and unlikely to be painted again if the mission didn't require it. Likewise the canvas, the paint would wrinkle and flake away or be replaced through wear and tear.
The Pinkies we have here, one is painted completely pink. The other not. In civilian ownership this was an easy decision to make, not based on tactical requirement, more like financial. The one that's been painted has the hand me down canvas that I took off when I replaced one complete set of canvas with new. I refitted the roughest set to 10FG67 and simply painted it to refresh it. I wasn't doing to do the same with the new canvas, it don't come cheap :)
The same with the tyres. I rotated the legal, but most worn tyres, on to 10FG67 and made them look a lot better by painting them.
The end result is a display that shows how it might have looked in theatre. One Pinkie looks like the keys have just been signed for and the other looks like it's had a very challenging tour :)
 
Hello everyone!
The continuation of the Pink Panther modelling works.
The driver's and front shooter's seats were modified a little bit.
I thought I might be able to post against each photo, apologies if I can but not looking hard enough.
Commanders' seat base is a storage box, the seat squab lifts off. Potential there to include some eye candy details such as inter vehicle jump lead or spare map, right angle torches, headset etc.
Commanders' footwell contains a First Aid kit. There's a short piece of narrow angle iron that it sits on, held down with a canvas strap.
Flare pistol is on the inner flank of the footwell, flare cartridges in a hinged box on the bulkhead. Another detail could be too have the box open and the flare cartridges visible.
 
Just little progress in work and a few macro photos
The expansion tanks beneath each long range tank have drain taps. I can share a photo. The long range fuel tanks are connected to the standard under seat tanks with braided fuel pipe. There are larger stopcocks behind each front seat base for topping up the under seat tanks.
A nice detail to add might be the dipstick fitted to each long range tank. Part of the routine chores was to "dip" the tanks to see how much fuel was left. The long dipstick had calibration marks engraved on them.
Have you done any work on the engine bay?
There is storage for 2 oil cans. Imperial gallon. I'll have a go at attaching files to my replies and see if that helps.
PXL_20230917_084654584.jpg
pinkierad.jpg
 
Last edited by a moderator:
Hello everyone!
The continuation of the Pink Panther modelling works.
The driver's and front shooter's seats were modified a little bit.
Commanders seat box, original and the one we had fabricated to replace missing seatbox on 2nd Pinkie. Likewise the diff guards. Laser cut but stick welded so they didn't look too neat. I left them outside unpainted for weeks to weather them, otherwise they looked too CNC and stood out like the balls on a Bulldog.

IMAG3071.jpg
IMAG3065.jpg
IMAG3072.jpg
IMAG3077.jpg
 
Last edited by a moderator:
Does anyone know what this radio is?
Looks very similar to US RT-175/PRC-9, but with minor differences.
Had the British used RT-175/PRC-9 or is it some other modification of the US/British radio?
It's an A41, a VHF radio, part of the Larkspur range of radio equipment. There is a frame bolted to the bulkhead that secures it, it can't be seen with the radio in place and the seatback up.
 
Thank you!
Work is going on
I'm throwing in bits and pieces, apologies if it's untidy.
You should see a photo of the footwell bracket for the First Aid box. There might be more photos of empty back body, duck boards, long range fuel tanks.20180912_202329.jpg
Hi all!
There hasn't been an update in the thread for a long time, so I'm back with new results.
I decided to work on the engine anyway. To do this, I cut out a large area of plastic, leaving only the desired part of the engine (pink). All other details had to be done by myself.
The engine is greatly simplified, especially in the upper part - the hood will not open, so I work only on what can be seen when viewed from below.

View of the engine itself and the engine compartment. Work in progress, there will be more details, at the moment the main blanks have been made.

View attachment 385349View attachment 385350View attachment 385351View attachment 385352View attachment 385353View attachment 385354View attachment 385357
Just a couple of observations, there's no panel between the front chassis rails, just under the radiator panel, you would be able to look straight through and see the steering relay and track rods. None of this would be noticed with the spare wheel mounted.


I posted a photo elsewhere of the gear and engine oil can holder. I see it in your engine bay photo but it looks incomplete or attributed to some other function. There's no pipe leading to it. I think I might know the reason for this error, there is a Pinkie in the Dunsfold collection with some cabling in the engine bay. Some think it was a fire extinguisher system but it's actually radio coax that seems to serve no appreciable purpose just yet. Hope this helps.
 

Attachments

  • DSCF2140.jpg
    DSCF2140.jpg
    127.8 KB · Views: 59
  • DSCF2136.jpg
    DSCF2136.jpg
    124.9 KB · Views: 49
  • DSCF2135.jpg
    DSCF2135.jpg
    108.3 KB · Views: 60
  • Harewood2009-3.jpg
    Harewood2009-3.jpg
    35.5 KB · Views: 59
  • Screenshot_20230130-203932_Gallery.jpg
    Screenshot_20230130-203932_Gallery.jpg
    64 KB · Views: 58
  • DSCF2141.jpg
    DSCF2141.jpg
    108 KB · Views: 36
  • Harewood2009-5.jpg
    Harewood2009-5.jpg
    34.8 KB · Views: 54
  • Eastnor2009015.jpg
    Eastnor2009015.jpg
    34.7 KB · Views: 61
  • DSCF2139.jpg
    DSCF2139.jpg
    135.2 KB · Views: 58
  • 20220514_182510.jpg
    20220514_182510.jpg
    81 KB · Views: 58
  • FB_IMG_1622183003661.jpg
    FB_IMG_1622183003661.jpg
    106.7 KB · Views: 62
  • DSCF2138.jpg
    DSCF2138.jpg
    116.6 KB · Views: 43
  • DSCF2137.jpg
    DSCF2137.jpg
    172.8 KB · Views: 51

Similar threads

Back
Top